How to Properly Winterize Your Car
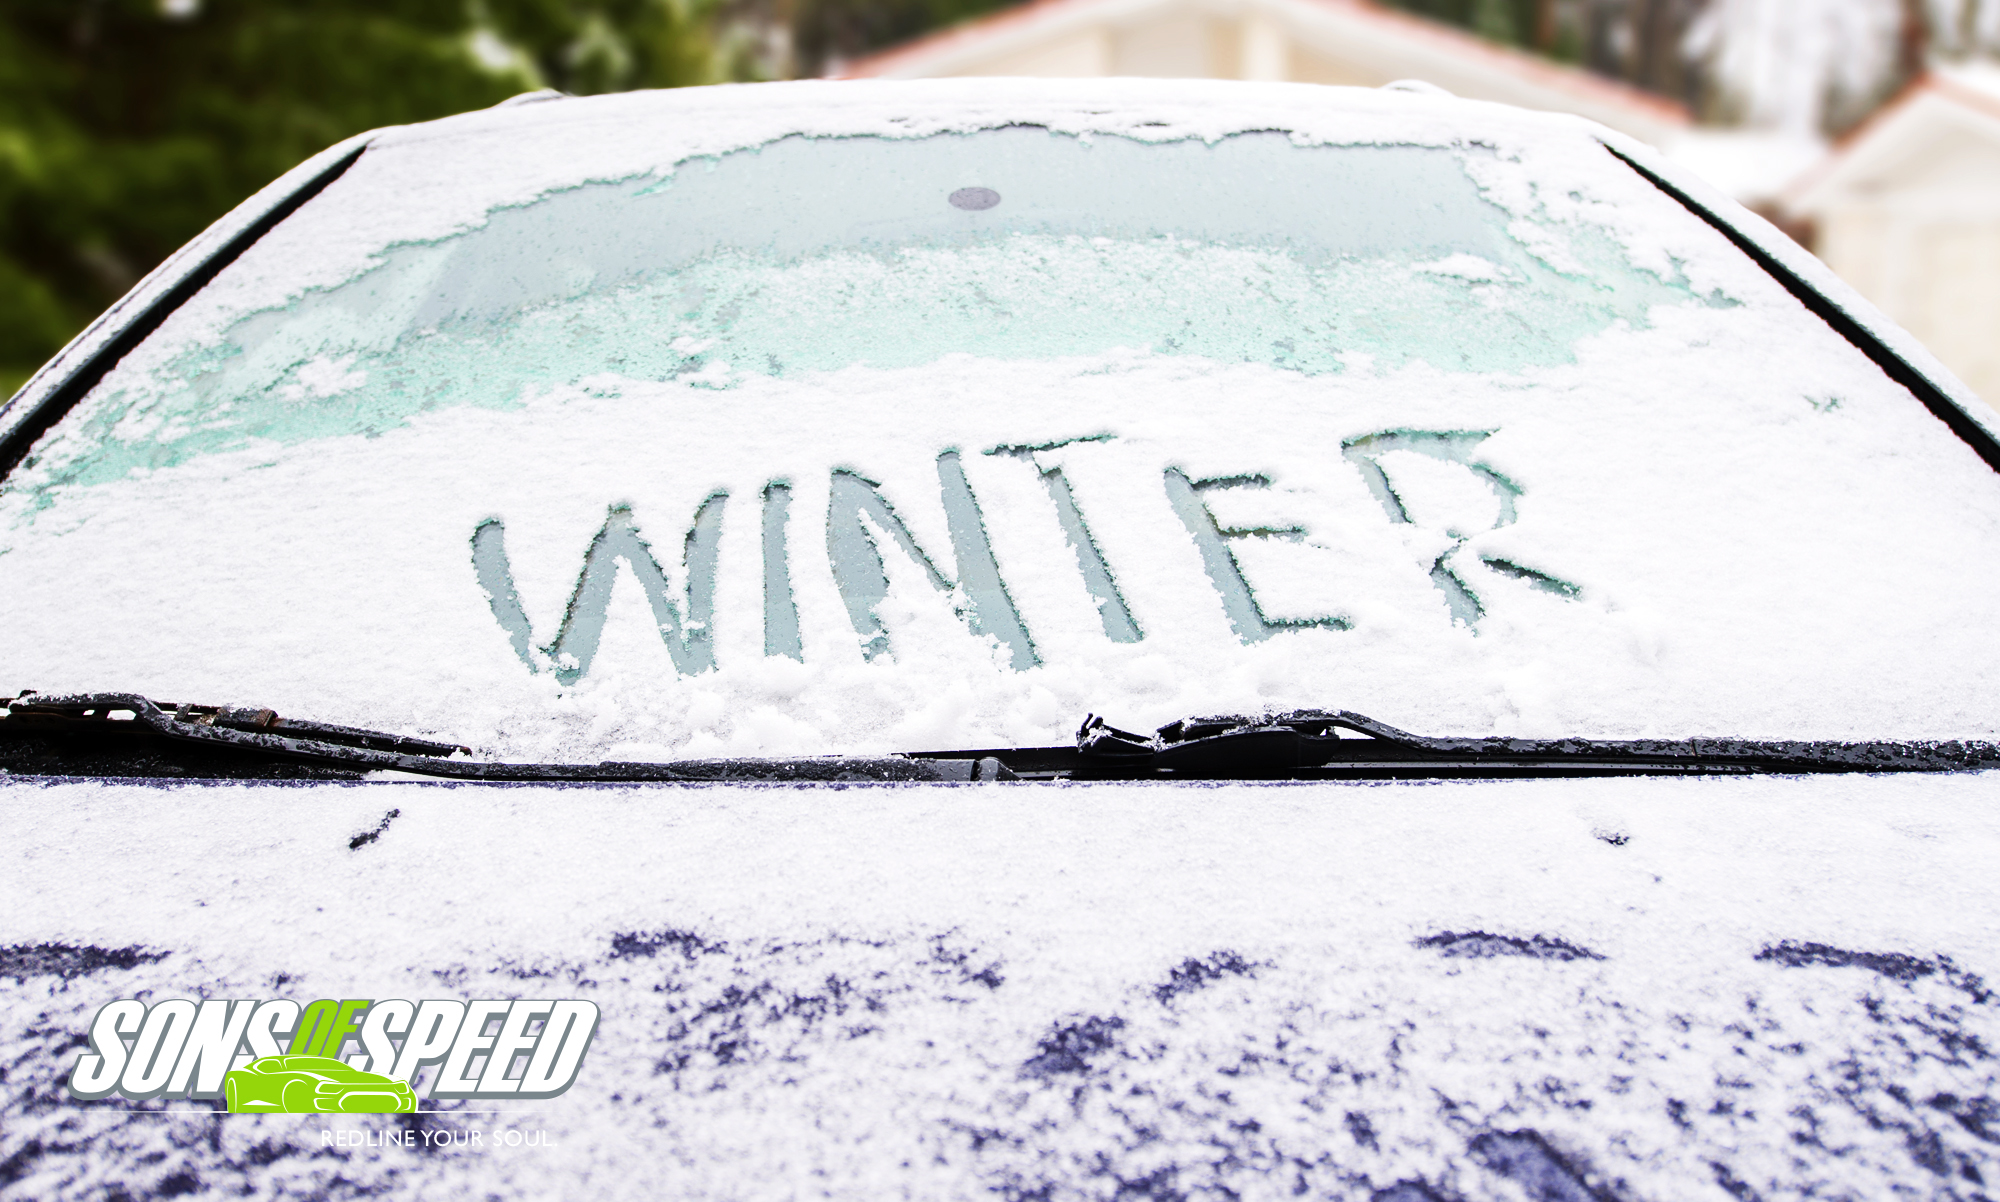
If you a reader of Sons of Speed and live in the snow belt, chances are you also have a rear-wheel drive sports car you’re about to put away for the next 4 to 5 months. Whether you’ve stored cars before or are taking your first crack at winter hibernation, our guide to winterizing your car will make sure your ride is fresh and ready to go come spring time.
Step One: Change the Oil
If you haven’t changed the oil in the last two weeks, change it right before you put the car away. You don’t want dirty and contaminated oil causing acidic erosion of your seals and gaskets. Putting the car away with fresh oil will help maintain and prolong the life of your engine’s internal parts.
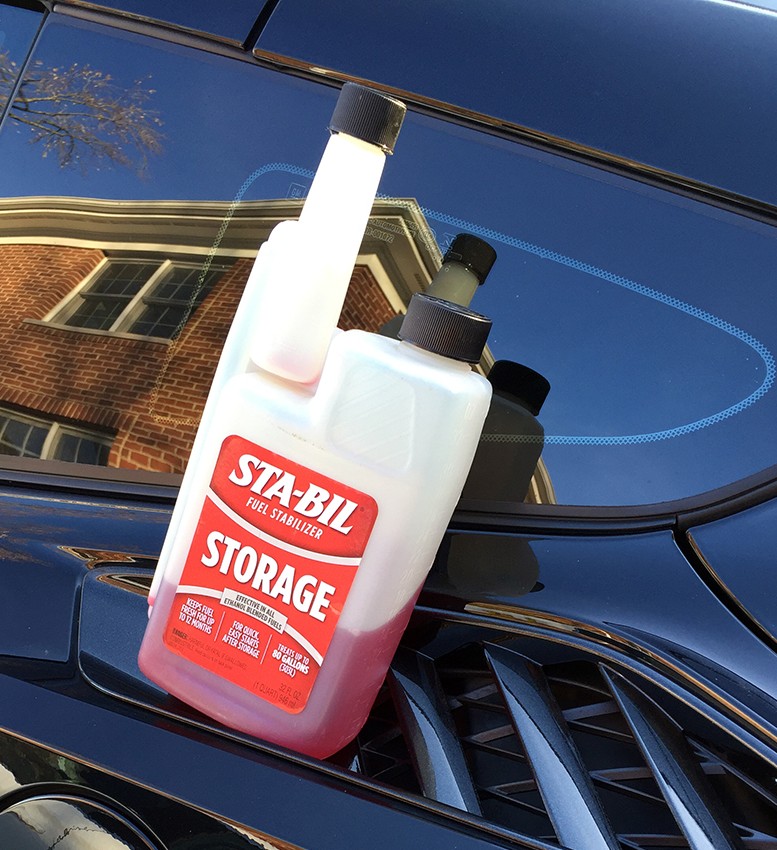
Step Two: Fuel Stabilizer and Gas
You’ll want to add the recommended amount of fuel stabilizer to the tank, but there is a science in doing this correctly. Assuming you live near a gas station, at home use a funnel and add enough stabilizer (we use Sta-Bil) to treat a full tank of gas. Then drive to the gas station and fill the tank with premium fuel. The drive over and back will help the stabilizer distribute throughout the entire fuel system, not just sit in the tank. Filing the tank to the brim prevents rust and condensation in the tank, and the premium fuel stores longer than regular (not that you’re using that in your sports car, right?).
Step Three: Time for a Bath
After returning from the gas station, give your car a thorough wash. Being that this Stingray wasn’t really that dirty to begin with, we opted for a waterless wash, which means we also didn’t need to worry about water lurking in any crevices for the winter. If you do wash with water, be sure to fully dry the car and do a short drive to blow some air through the panel gaps and scrape any rust from the rotors.
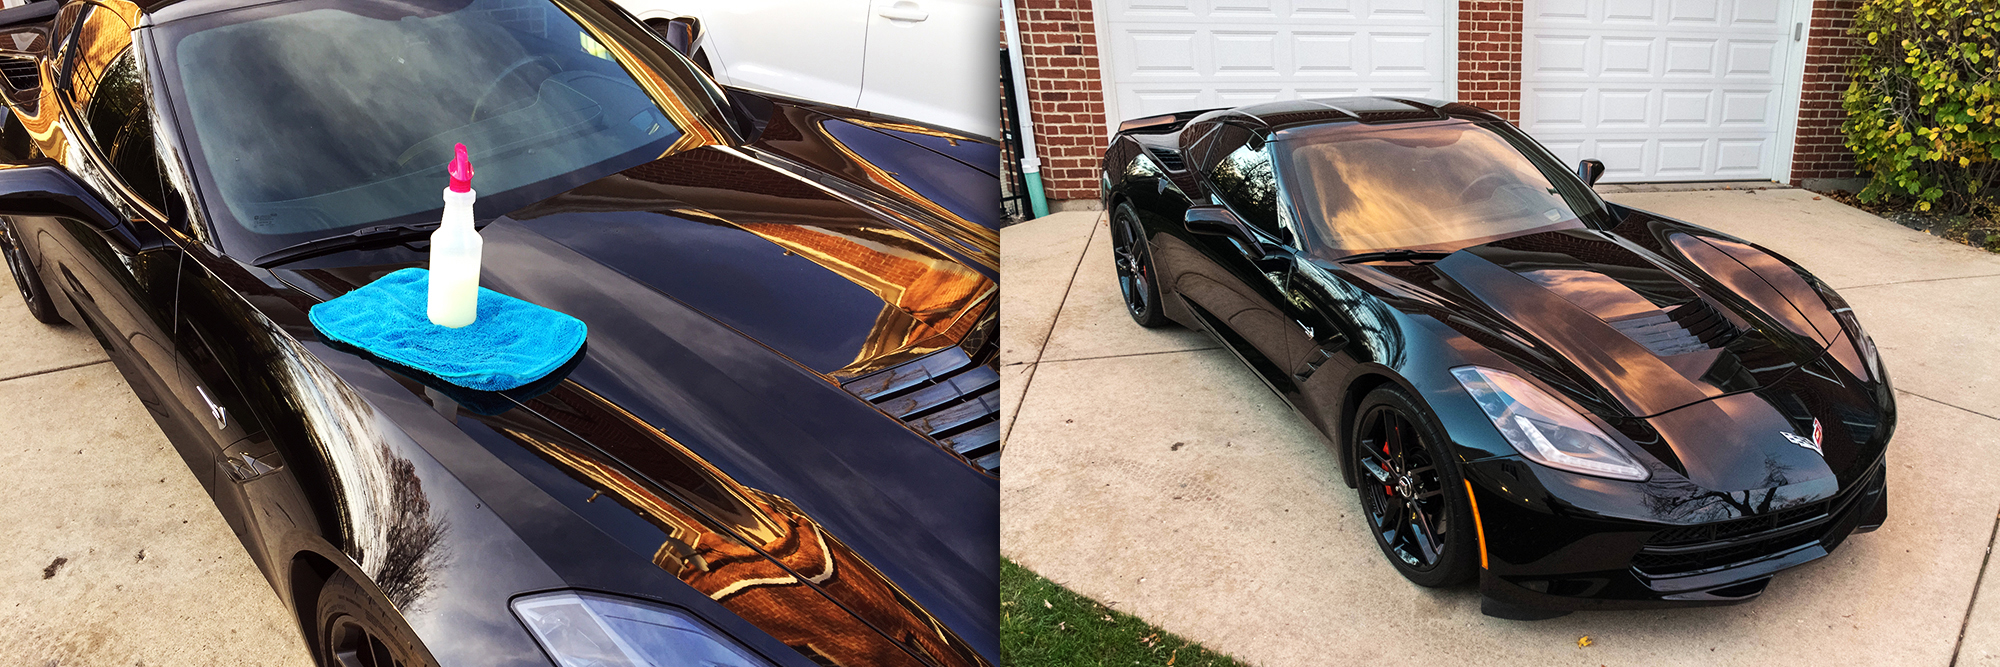
RIGHT IMAGE: The Stingray after a full waterless wash but before the polishing. Don’t forget to dress the tires! LEFT IMAGE: There are many great waterless washes on the market today, just make sure to use super-plush microfiber towels and remove the tags from the towels. Use about one towel per side, one for the hood and roof, and one for the front and rear. Keep a clean towel with you to go back over the surface after cleaning with the “wet” towel. Use one of “wet” towels to clean the wheels. Clean the glass with glass cleaner first.
If you’ve spent the prior six months tearing up the track, this may also be a good time to polish your dirty exhaust pipes. This system uses a few different compounds and a finishing paste that really brings the shine out of the dirty outer pipes.
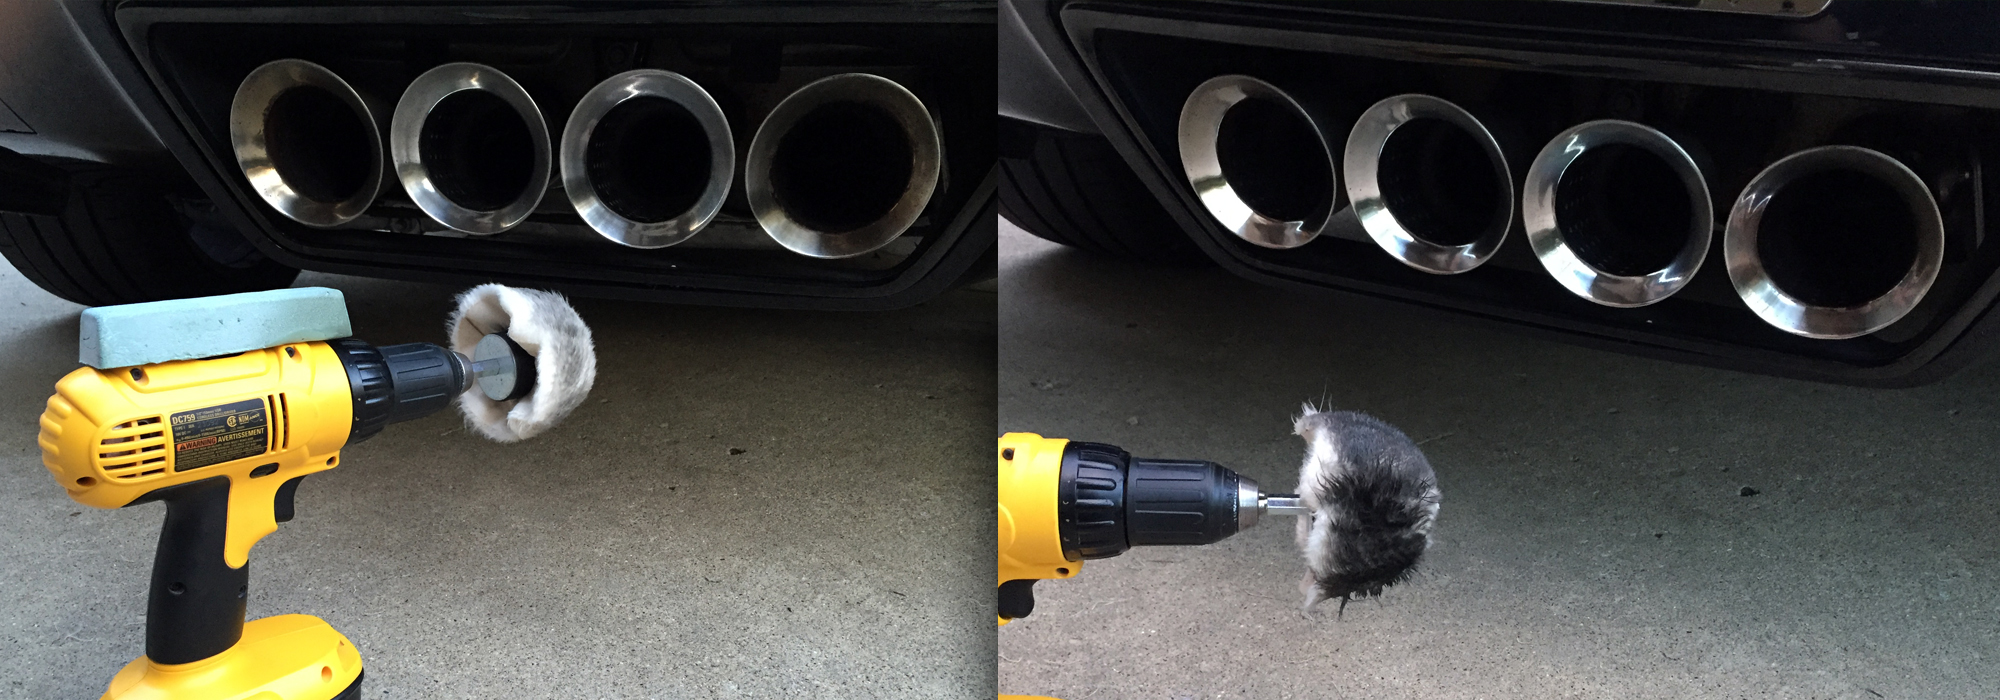
IMAGE: Before & After
Step Four: The Inside-Out Detail
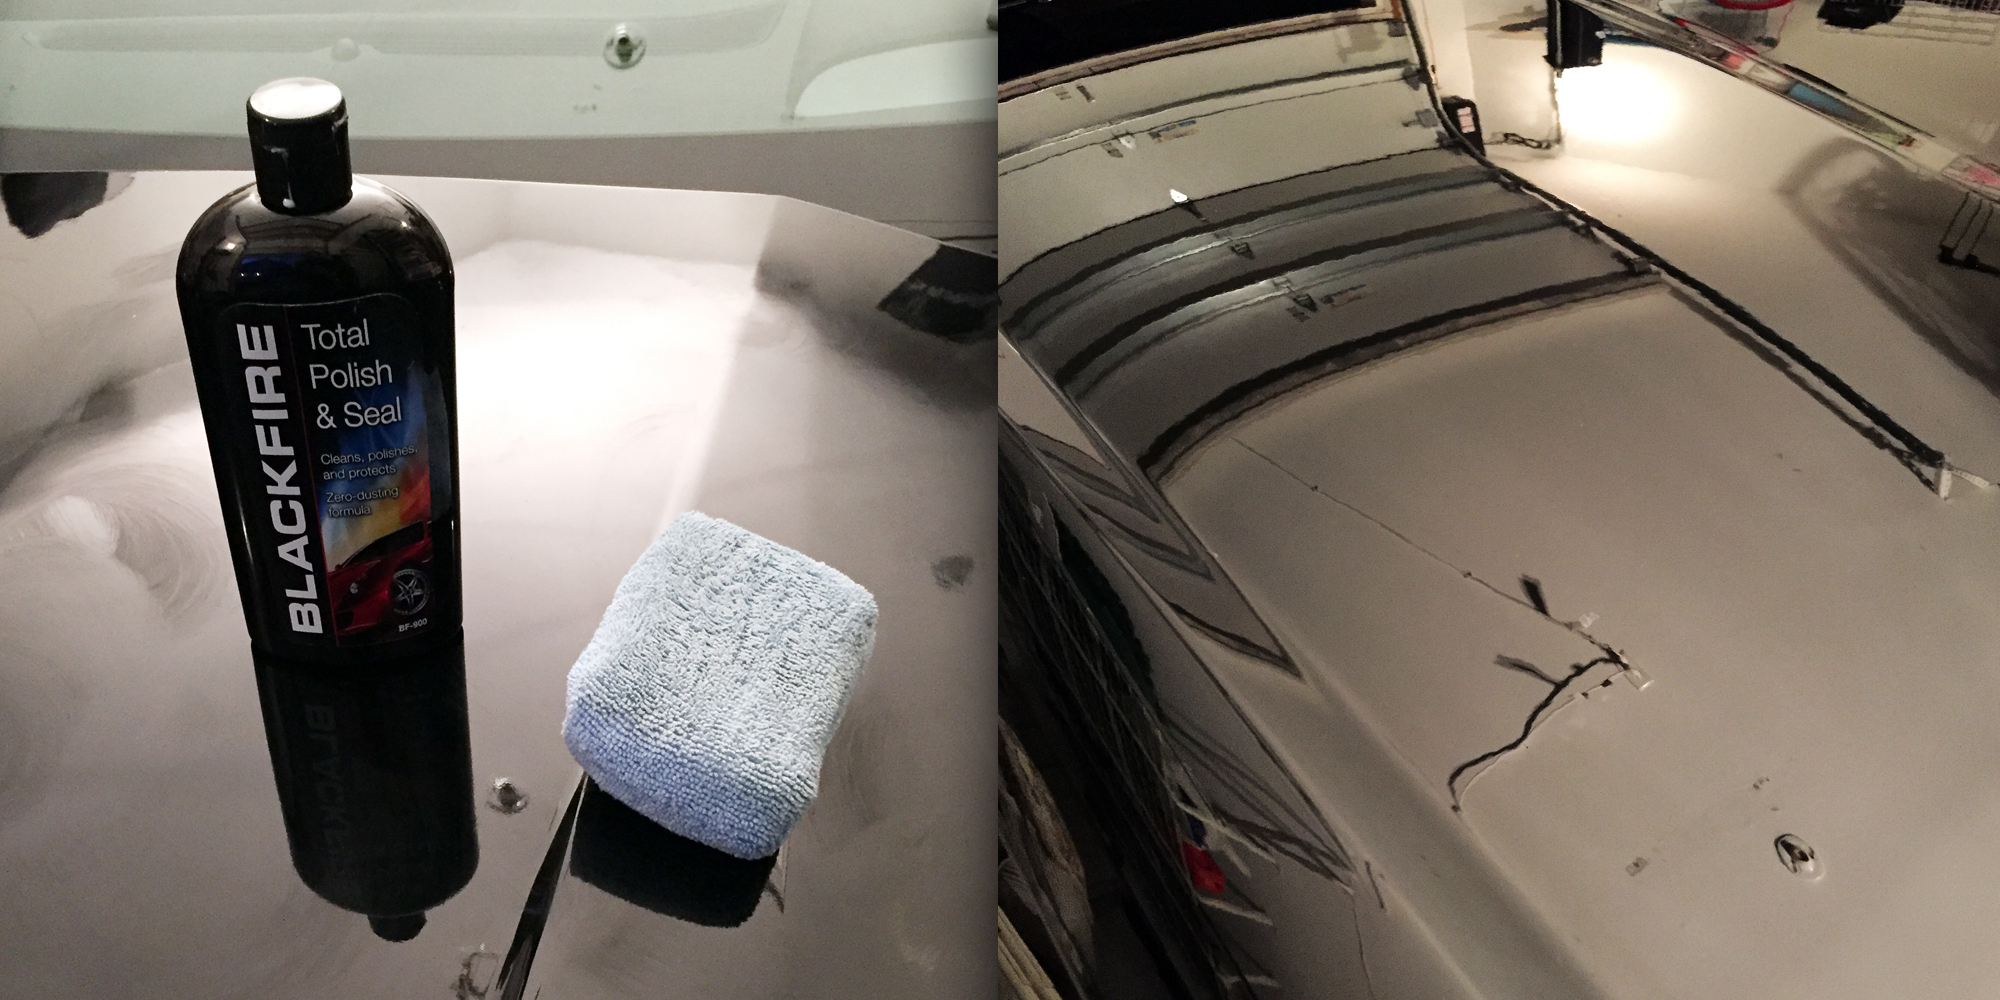
After a thorough wash, you’ll next want to apply your favorite wax or car polish. Here, we went over the Corvette with Blackfire’s Total Polish and Seal by hand. We applied a light application to the whole car, then simply wiped it off with the same microfiber plush towels we used earlier. The results were fantastic, and the polish adds a layer of protection between your paint and the car cover. As a bonus, when you unwrap your ride in the spring, it will look good as new!
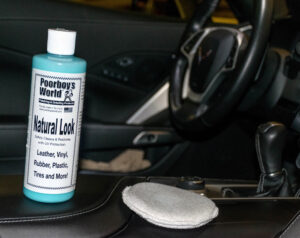
Next, thoroughly clean the inside of the car, being sure to treat leather surfaces that may need cleaning and conditioning from recent use and to protect the seats from drying out in storage. As an all-in-one solution, we’ve found Poorboy’s World Natural Look works great on leather, plastic and rubber. Simply rub it on using a terry-cloth applicator and use the back side to wipe off any excess. Clean the inside of the windows with window cleaner (be sure to get tint-safe cleaner if you have tinted windows), vacuum the carpets and seats and empty the car of anything you might need over the winter.
Step Five: Don’t Go Flat

Most owners’ biggest storage concerns revolve around keeping the tires round and avoiding flat-spotting. Flat spots can form when a tire’s contact patch sits on the same flat surface for a long period of time, resulting in a thump-thump-thump sound from the tires when you finally drive the car again. You can prevent flat-spotting in a few ways. One, you can use a product called Flatstoppers that cradles your tire in a concave hard plastic “shell.” The idea behind this product is that if your tire is sitting in a cradle, rather than on a flat hard surface, the force of gravity on the tire will be evenly disbursed at the now-larger contact patch. We’ve used this product before and it works – no evidence of any flat-spotting after four months of storage. The only issue we encountered is that the underside of the product is hard and will not grip a smooth surface – like our lift or a tarp. This means as you drive up and over the Flatstopper, it naturally wants to just slip away. To provide much needed friction, we added a sheet of tacky cabinet liner from your local hardware store beneath each Flatstopper and took a “running” start at the ramp. You could also simply jack each side of the car up and place the Flatstopper beneath the wheels.
Another option is to over inflate your tires to keep the contact patch from flattening out. The exact amount of air will vary for each car, but one recommendation for the C7 Corvette (which uses 30 psi cold pressure normally) was 45 psi. Because over-inflating a tire this much is inherently dangerous (it is just a fancy balloon, after all) and you could forget to deflate the tires in the spring, causing unsafe handling conditions, we recommend investing in the Flatstoppers or rocking (don’t start it!) your car a few feet back and forth every few weeks.
One thing you absolutely do NOT want to do is put your car on jack stands or blocks. Doing so will put unnecessary and harmful strain on your suspension’s springs and bushings. If your garage gets very cold, you may want to also invest in a set of tire covers to keep the rubber from drying out.
Step Six: Prepare the Floor
If you are parking the car directly on the floor in an unheated garage (and not on a lift, like this Stingray is), then you’ll want to put down a waterproof tarp under the entire car to act as a moisture barrier. Concrete can draw the moisture out of tires, contributing to early dry-rot, so make sure the tires have at least some kind of barrier beneath them (i.e. a tarp or cardboard). If your garage floor has been covered with epoxy, or if you have a storage lift, this won’t be an issue for you.
Step Seven: Keep Critters Away
Another major concern in storing a car is to keep it from being a warm and cozy home for a family of field mice (or worse). To keep the critters out, you will employ a potpourri of smells that are sure to convince Mickey and family to find a new abode for the winter. Mice and other animals are incredible climbers, and most use the tires and exhaust to enter your car’s undercarriage, where they’ll either nest in the engine compartment (using your wiring and firewall liner to make a plush bed), or they’ll chew their way into the main compartment, usually resting behind the instrument panel or in or under the seats. Believe us, you don’t want to be facing this problem when spring arrives.
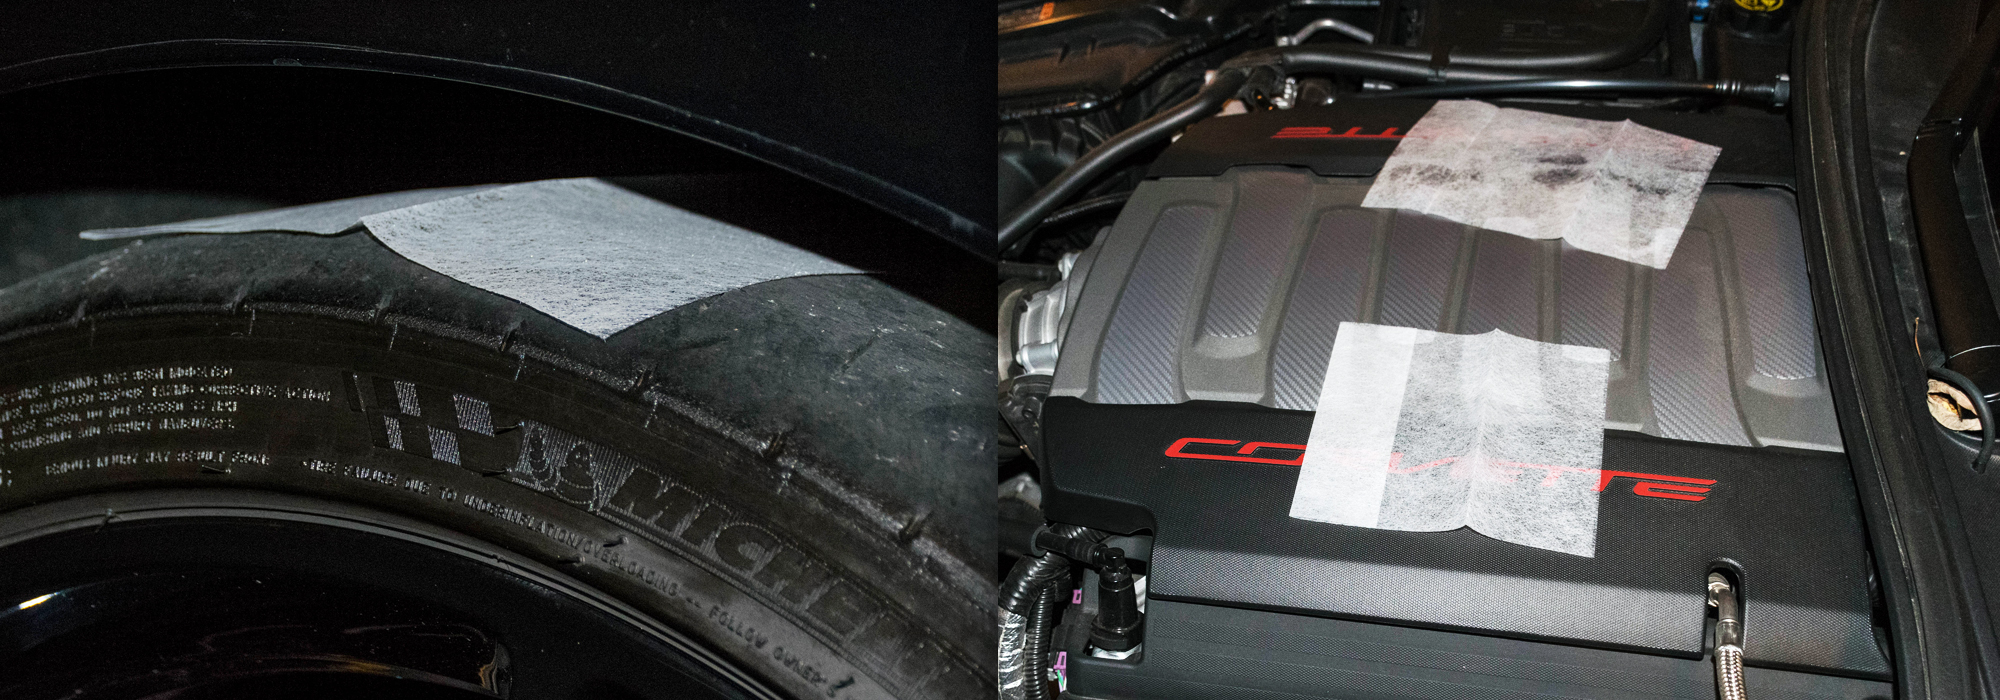
To prevent this nightmare scenario, place mothballs or fresh dryer sheets around tires, inside the engine compartment and inside the passenger compartment and trunk. Also, place balls of steel wool inside your tailpipes (just don’t forget to remove all of these in the spring).
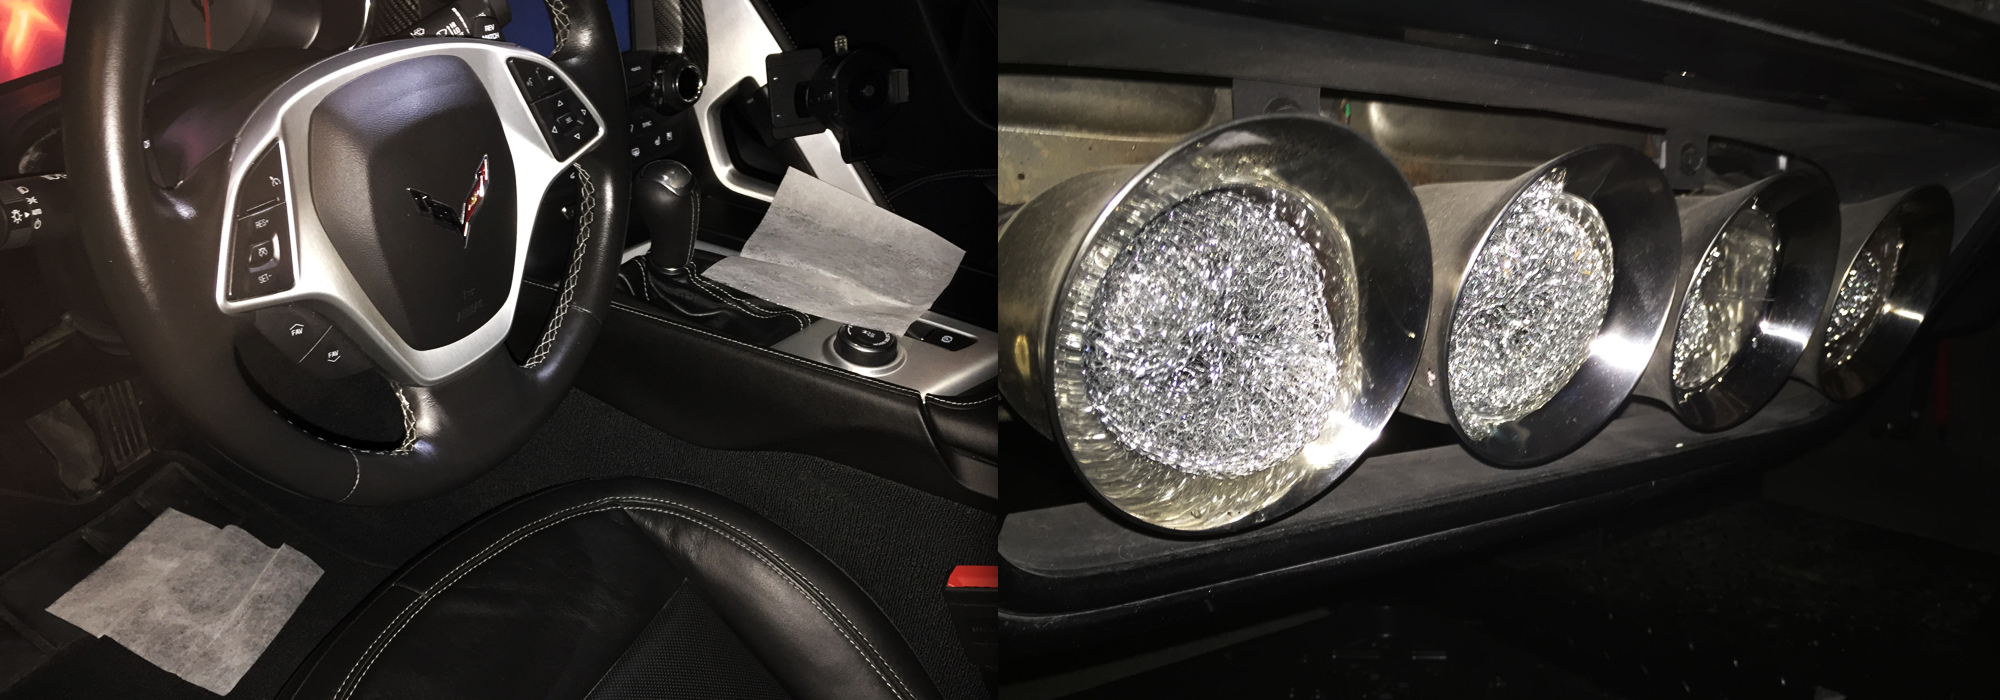
As a reminder to remove the sheets from the engine bay, we keep the hood popped (i.e. resting closed but not latched). If you have had a history of mice or other critters in your garage, you may want to also set traps up around the area and check them frequently. Finally, keep an open box of baking soda in the passenger compartment to soak up any odors.
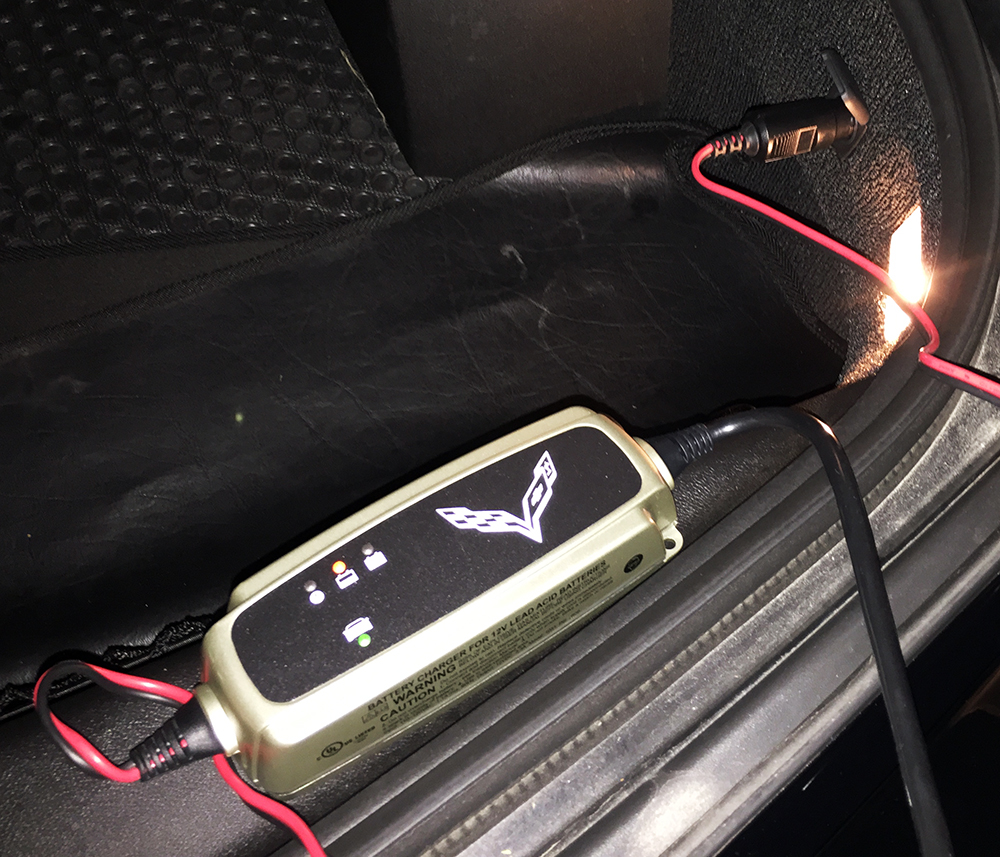
Step Eight: Trickle Charge
Hook up a battery tender using the instructions provided with the unit. A good tender will monitor when the battery is full and stop charging, then kick on when it starts to lose juice. You could always disconnect and move your battery inside, but in today’s cars, that’s not only harder to physically do (this Vette’s battery is in the trunk), it may just mess up the many computer systems these new cars use to keep everything working together. The battery tender we use was an option with the Corvette from the factory, and works by plugging a cigarette adapter-style plug into the trunk’s 12-volt outlet and the other side into a normal 110-volt wall outlet. Keep the charger outside the car so you can check on it periodically throughout the winter to ensure everything is working properly.
Step Nine: Cover Up
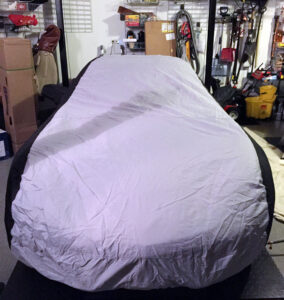
Now that your car is clean, protected and prepped, it’s time to wrap it up. Use a good quality, breathable fitted car cover and place the middle of the cover on your roof with the front and rear pointed in the right directions. Start by placing the mirrors into the cover’s mirror pockets. This step will make getting the rest of the cover on a piece of cake. Once the cover is in place, check to make sure your dryer sheets and/or moth balls are still in place, and say goodbye until Spring! One word of warning: Never, ever put a car cover on a dirty car! You will scratch your car’s surface and ruin the car cover. Always at least give the car a waterless wash before putting the cover on.
While your car is now ready to hibernate, you’ve still got some work to do.
Step Ten: Save Some Money
Once the car is safely stored, inform your insurance agent that you are storing the car for the winter and ask about taking your coverage down to comprehensive only, dropping the liability part of your policy. This can be a significant savings for most owners. If you have paid services like Sirius/XM or OnStar, call each one and ask for the service to be put on “vacation” while the car is stored. No sense in paying for a service you can’t use.
What To Do Next
Periodically check the battery tender to ensure proper operation and also check for any signs of rodents.
What NOT To Do
While you may be tempted, don’t start and idle the car during the winter. If you’ve followed the above steps, this is not only completely unnecessary, but you will introduce moisture into the drivetrain and exhaust which can lead to premature corrosion and failure. Resist the temptation and know that you’ve properly stored the car and have nothing to worry about.
In the Spring
Follow this guide in the reverse order and you’ll be ready to go once spring arrives in a clean, detailed car. The only thing left to do then is figure out what tracks you’re going to tear up in the new season!